Brick has a way of making even the most updated home look stuck in time. The good news?
A fresh coat of paint can completely change that.
Painting brick is one of those upgrades that looks like a big job but is very doable, as long as you know what you’re getting into. It’s not like painting drywall.
Brick is porous, textured, and unforgiving if you skip steps. But with the right prep, the right tools, and a little patience, the results speak for themselves.
Whether you’re freshening up an interior accent wall or tackling the full exterior, this guide walks you through everything from what to expect before you start to how to keep it looking great for years.
What to Know Before Painting Brick?
Brick is porous. It absorbs water and expands and contracts with temperature changes. That matters a lot when you’re thinking about painting it.
Once you paint the brick, going back isn’t easy. The paint bonds deep into the surface, making removal a serious job. Treat this as a long-term decision, not a weekend experiment.
Interior brick behaves differently from exterior. Outside, it faces rain, humidity, and sun, all of which wear paint down faster. Inside, conditions are more stable, so paint tends to last longer.
On average, painted brick lasts 15 to 20 years. That depends on a few things: how well the surface was prepped, whether moisture is present, and the quality of paint used. Skip any of these, and you’ll see peeling or cracking far sooner.
Preparing Brick for Painting
Having the right tools before you start makes the whole process smoother. Here’s everything you’ll need.
| Category | Item | Purpose |
|---|---|---|
| Tools | Airless Paint Sprayer | Covers large brick surfaces quickly and evenly |
| Thick Nap Rollers (¾” or 1″) | Pushes paint into the rough texture of brick | |
| Angled Brushes | Cuts in around edges, corners, and trim | |
| Materials | Acrylic Latex Paint | Breathable, flexible, and ideal for brick surfaces |
| Masonry Primer | Improves adhesion and seals porous surfaces | |
| Cleaning Solution (TSP or masonry cleaner) | Removes dirt, mildew, and stains before painting |
With these on hand, you’re set up for a clean and efficient job from start to finish.
Preparation is everything. A well-prepped surface means paint that sticks and lasts. Rush this part, and you’ll regret it later.
Cleaning the Surface
Start by scrubbing the brick with a masonry cleaner or TSP solution. Remove all dirt, mildew, moss, or organic growth. Use a stiff brush or a pressure washer on exterior brick. The surface should look genuinely clean, not just “good enough.”
Inspecting and Repairing
Once it’s clean, take a close look. Check for:
- Cracks in the brick: fill with a masonry patching compound
- Damaged or crumbling mortar: repoint those joints before painting
- Efflorescence (white chalky deposits): scrub it off completely; paint won’t bond over it
Paint won’t hide structural problems. It’ll just make them harder to fix later.
Drying Time
Brick must be completely dry before any paint goes on. After washing, wait at least 24 to 48 hours. For exterior brick, check the weather forecast too. Avoid painting if rain is expected within a day or two.
Step-by-Step Process to Paint Brick

Follow these steps in order. Each one builds on the last, and skipping any of them usually shows up in the final result.
Step 1: Protect Surroundings
Before anything else, protect what you don’t want painted.
- Mask off windows, doors, and trim with painter’s tape
- Lay drop cloths on the floors or landscaping below
- Cover outlets or light fixtures near the wall
A little prep here saves a lot of cleanup later.
Step 2: Apply Primer if Needed
Primer isn’t always required, but on raw, unpainted, or highly porous brick, it makes a real difference.
- Use a masonry-specific primer
- Apply it the same way you’ll apply paint: spray and back roll
- Let it dry fully before moving to the next coat
Primer improves adhesion and gives you better, more even coverage with fewer coats.
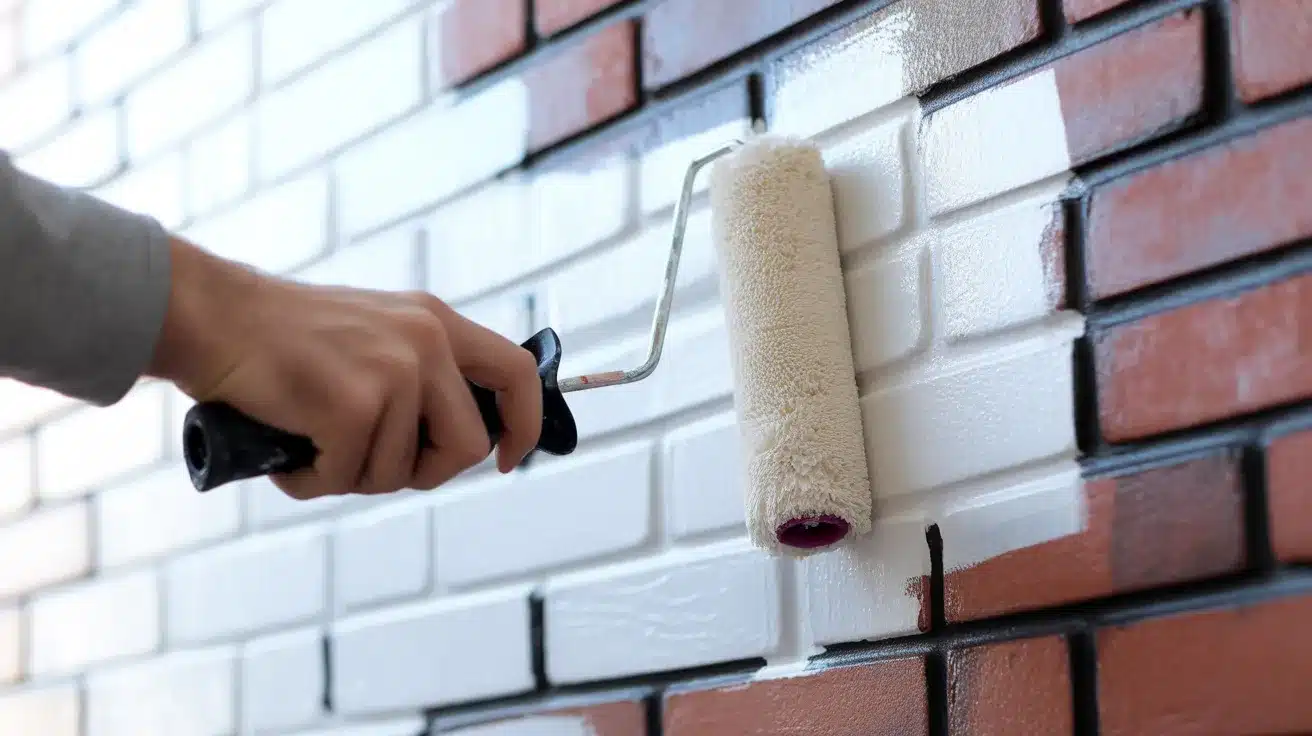
Step 3: Spray the First Coat
Load your airless sprayer and apply the first coat of paint.
- Keep the sprayer 12 to 18 inches from the surface
- Use smooth, overlapping passes and don’t stop mid-wall
- Cover both the brick face and the mortar joints
Work in sections so the paint doesn’t dry before you can back-roll it.
Step 4: Back Roll the Paint
Right after spraying a section, go over it immediately with a thick nap roller.
- This pushes paint into the texture and deep into mortar joints
- It eliminates thin spots and air pockets
- Don’t skip this, especially on rough or heavily textured brick
Back rolling is what separates a lasting paint job from one that peels within a year.
Step 5: Apply the Second Coat
Once the first coat is fully dry, apply a second coat the same way: spray, then back roll.
- Look for any missed spots or uneven areas and address them now
- Allow proper cure time before exposing the surface to heavy use or weather
Two coats are what make the finish hold up long-term.
Video Tutorial
Special thanks to Tribble Painting Company for providing valuable insights in their video, which I referenced while creating this guide.
Do’s and Don’ts of Painting Brick
Making a few thoughtful and informed decisions at the beginning of a project can ultimately save you from facing unexpected and expensive repairs in the future.
By taking the time to carefully consider your options and plan accordingly, you can avoid many common pitfalls that lead to unnecessary costs down the line.
| ✅ Do’s | ❌ Don’ts |
|---|---|
| Clean the brick thoroughly before painting | Don’t paint over dirty or damp surfaces |
| Use breathable acrylic latex paint | Don’t use non-breathable or oil-based paints |
| Apply with a sprayer and back roll | Don’t skip back rolling on textured brick |
| Test a small area first to check adhesion and color | Don’t assume paint can be easily removed later |
| Apply two full coats for durability | Don’t apply thin or uneven coats |
| Let the brick dry completely before starting | Don’t ignore moisture-prone or damp areas |
Follow the do’s, avoid the don’ts. It really is that straightforward.
Embracing the actions that lead to positive outcomes while shunning the missteps can significantly enhance your experience. When you focus on what works and learn from what doesn’t, you create a clearer roadmap toward achieving your goals.
Remember, staying mindful of these principles can help you navigate challenges more effectively and unlock your full potential.
Maintenance Tips for Painted Brick
While painted brick is known for being low-maintenance, it’s important to understand that it isn’t completely maintenance-free.
To keep it looking its best and ensure its longevity, incorporating a little routine care can make a significant difference.Let’s look into it:
- Cleaning routine: Wash painted brick once or twice a year with mild soap and water. A soft brush works well on exterior walls and helps prevent grime buildup over time.
- Preventing mildew: In humid areas, it can appear on painted surfaces. Spot-treat with a diluted bleach solution (1 part bleach to 3 parts water). Good airflow around the wall helps prevent it from coming back.
- Touch-up tips: Keep a small amount of the original paint stored away. For minor chips or scuffs, clean the spot, let it dry, and brush on a thin coat. Using the exact same paint makes blending much easier.
- When to repaint: If you notice widespread peeling, fading, or chalking, it’s time for a fresh coat. Most painted brick holds up well for 15 to 20 years, but harsh climates or poor initial prep can shorten that window.
Final Thoughts
Painting brick isn’t complicated, but it does reward the people who take it seriously.
Clean the surface well. Let it dry fully. Use the right paint and back-roll every coat. These aren’t extra steps; they’re what makes the difference between a finish that lasts two years and one that lasts twenty.
If you’ve been on the fence, hopefully this guide gave you the clarity to move forward. Start small if you’re unsure. Test a patch, see how it looks, and go from there.
Ready to give your brick a fresh new look?
Gather your tools, follow the steps, and take it one coat at a time. The results will be worth it. Certainly! Here’s an expanded version of that line:
