
Who knew a paper plate and some paint could turn into the best afternoon you’ve had in a while?
Farm crafts have a way of bringing out creativity in both kids and adults, no fancy supplies needed.
Whether you’re a parent looking for a fun activity, a teacher planning a themed lesson, or just someone who loves making things with their hands, these crafts are worth trying.
They’re simple, budget-friendly, and honestly just a lot of fun. From fluffy cotton ball sheep to full farmyard collage scenes, there’s something on this list for every skill level.
So clear off the table, grab your supplies, and let’s get into farm crafts that are as enjoyable to make as they are to show off.
15 Fun and Creative Farm Crafts to Try
Farm crafts are a great way to bring the charm of the countryside right to your craft table. Whether you’re doing these with kids or just looking for a fun weekend project, there’s something here for everyone.
1. Paper Plate Cow Craft

Turn a paper plate into an adorable cow face using paint, paper ears, and googly eyes. It’s one of the simplest farm crafts and a great starting point for younger kids.
Materials Required:
- Paper plate
- Black and white paint
- Construction paper (for ears)
- Googly eyes
- Glue
- Markers
Steps:
Step 1: Paint the paper plate white and let it dry completely.
Step 2: Cut out two ear shapes from construction paper and paint them with black spots.
Step 3: Glue the ears to the back of the plate on both sides.
Step 4: Stick googly eyes onto the front of the plate.
Step 5: Draw or paint black spots on the face, then add nostrils with a marker.
2. Popsicle Stick Tractor Craft
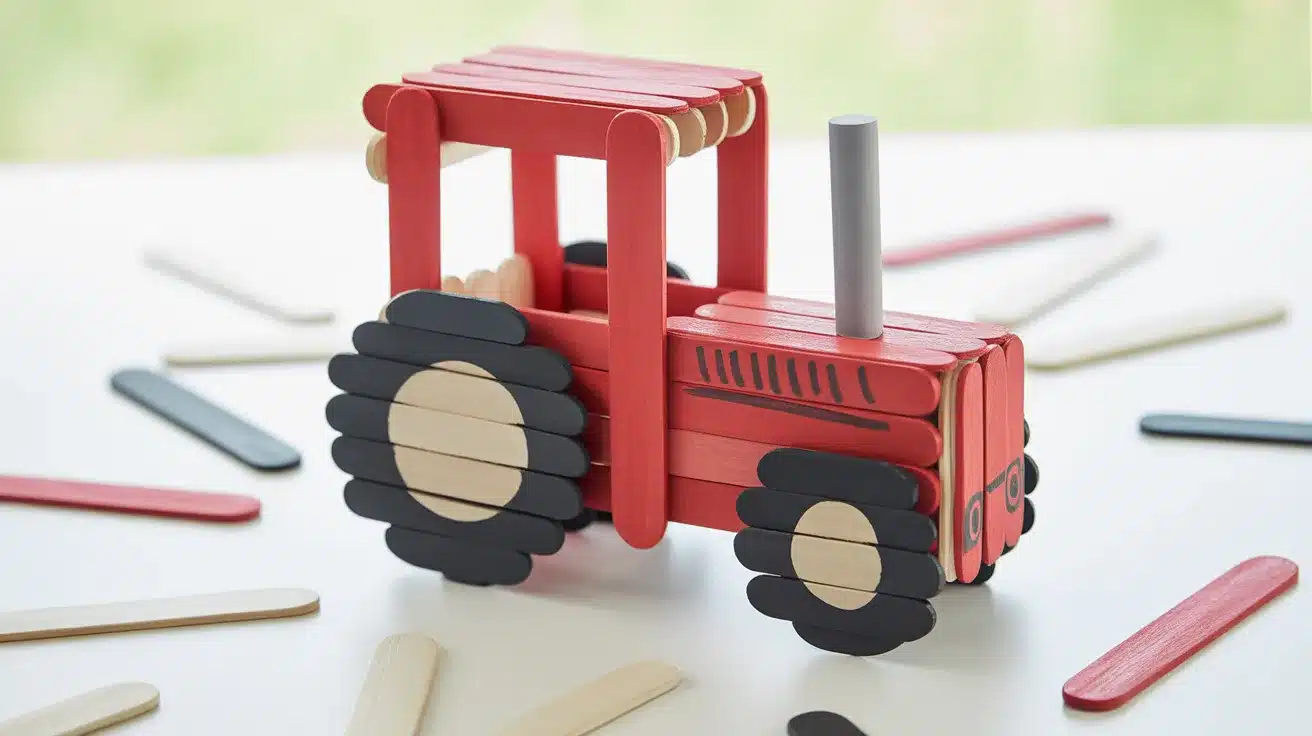
Build a colorful tractor using craft sticks and paint, a fun nod to classic farm machinery that kids absolutely love putting together.
Materials Required:
- Popsicle sticks
- Acrylic paint (red, green, or yellow)
- Black cardstock (for wheels)
- Glue
- Markers
Steps:
Step 1: Lay out popsicle sticks side by side and glue them together to form the tractor body.
Step 2: Paint the body in your chosen color and let it dry.
Step 3: Cut four circles from black cardstock for the wheels, two large and two small.
Step 4: Glue the wheels to the bottom of the tractor body.
Step 5: Add details like windows and an exhaust pipe using markers.
3. Cotton Ball Sheep Craft
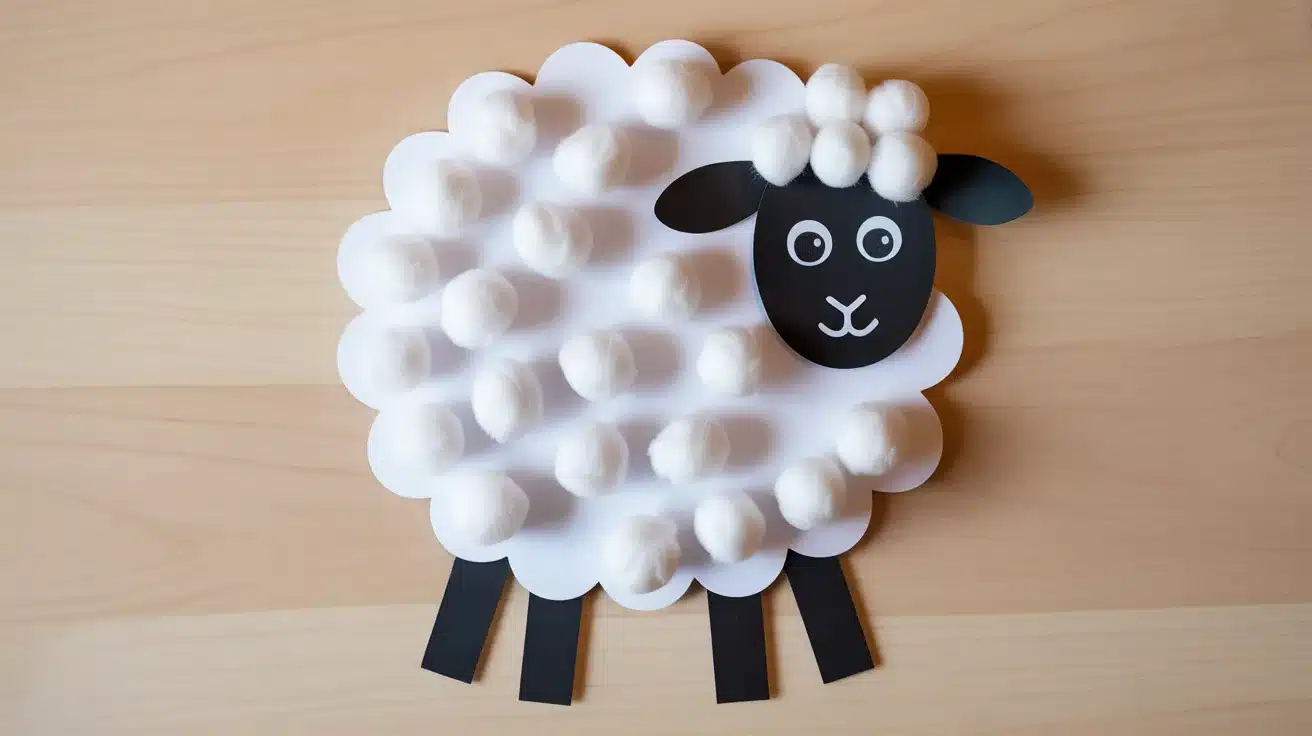
Gluing cotton balls onto paper creates the fluffiest little sheep you’ve ever seen. The texture makes it stand out, and it’s super satisfying to make.
Materials Required:
- White cotton balls
- Black construction paper
- White cardstock or paper
- Glue
- Markers
Steps:
Step 1: Draw a simple sheep body outline on white cardstock and cut it out.
Step 2: Cut the head and legs from black construction paper and glue them onto the body.
Step 3: Cover the body area with glue and press cotton balls onto it one by one.
Step 4: Let it dry fully before adding facial details with a marker.
4. Egg Carton Chicken Craft
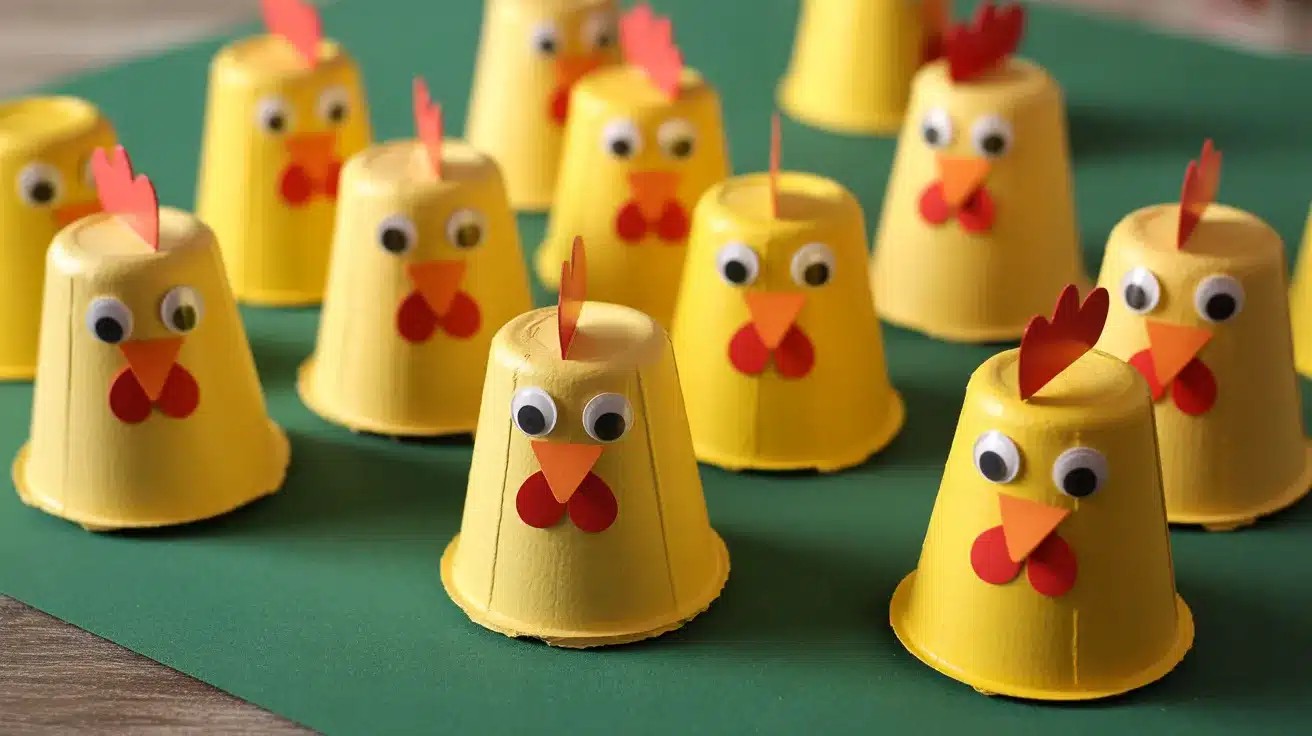
Those old egg cartons are perfect for crafting tiny chickens. A little paint and some paper details bring these cute birds to life.
Materials Required:
- Egg carton (cardboard)
- Yellow and orange paint
- Red construction paper (for comb and wattle)
- Googly eyes
- Glue
- Scissors
Steps:
Step 1: Cut individual egg carton cups apart and trim the edges to form a round body shape.
Step 2: Paint each cup yellow and let it dry.
Step 3: Cut small triangles from orange paper for the beak and glue them on.
Step 4: Cut a comb and wattle from red paper and attach them to the top and chin area.
Step 5: Stick on googly eyes to finish the face.
5. Handprint Chicken Art
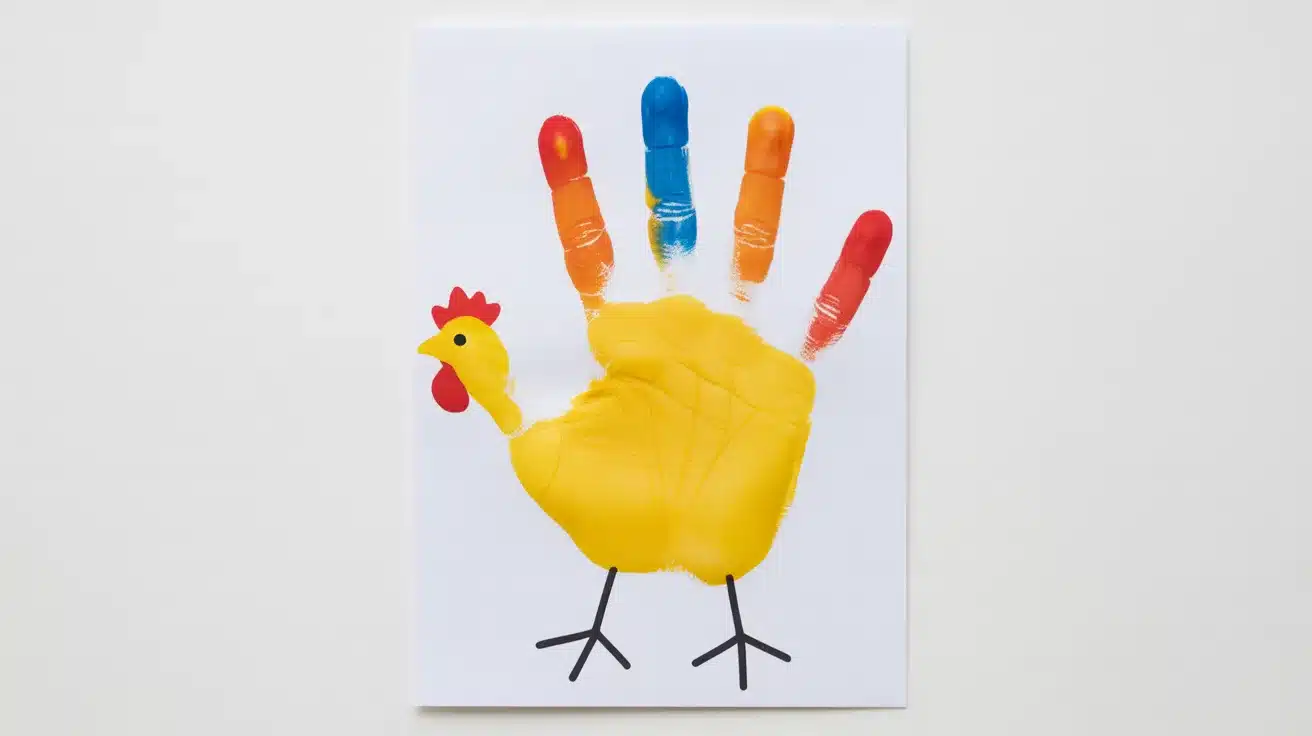
Painted handprints make surprisingly great chickens. It’s a playful and personal craft that doubles as a fun keepsake.
Materials Required:
- Washable paint (yellow, red, orange)
- White cardstock or canvas paper
- Paintbrush
- Markers
Steps:
Step 1: Paint a child’s palm yellow and press it firmly onto the paper to form the chicken’s body.
Step 2: Dip fingers into different colors and press them onto the body to create feathers.
Step 3: Once dry, draw a beak and feet using an orange marker.
Step 4: Add an eye and a red comb with a marker or paint.
6. Wooden Spoon Farm Animal Puppets
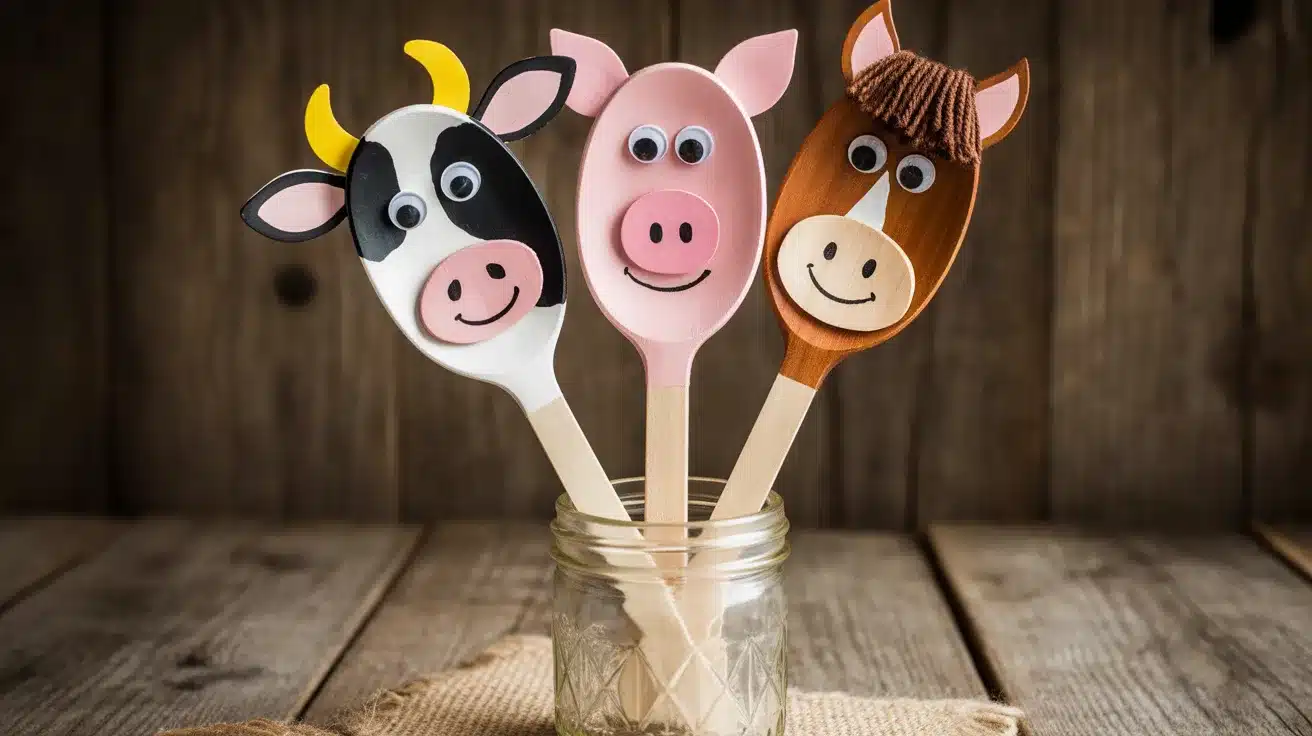
Wooden spoons make surprisingly great puppets. Decorate them as cows, pigs, or horses and let the farmyard storytelling begin.
Materials Required:
- Wooden spoons
- Acrylic paint
- Felt scraps
- Googly eyes
- Glue
- Markers
- Yarn (for manes or tails)
Steps:
Step 1: Paint the spoon in the base color of your chosen animal and let it dry.
Step 2: Cut ears from felt and glue them onto the sides of the spoon’s head.
Step 3: Stick on googly eyes and draw a nose and mouth with a marker.
Step 4: Add yarn for a horse mane or felt spots for a cow.
Step 5: Let everything dry before using the puppet for play.
7. Recycled Bottle Chicken Craft
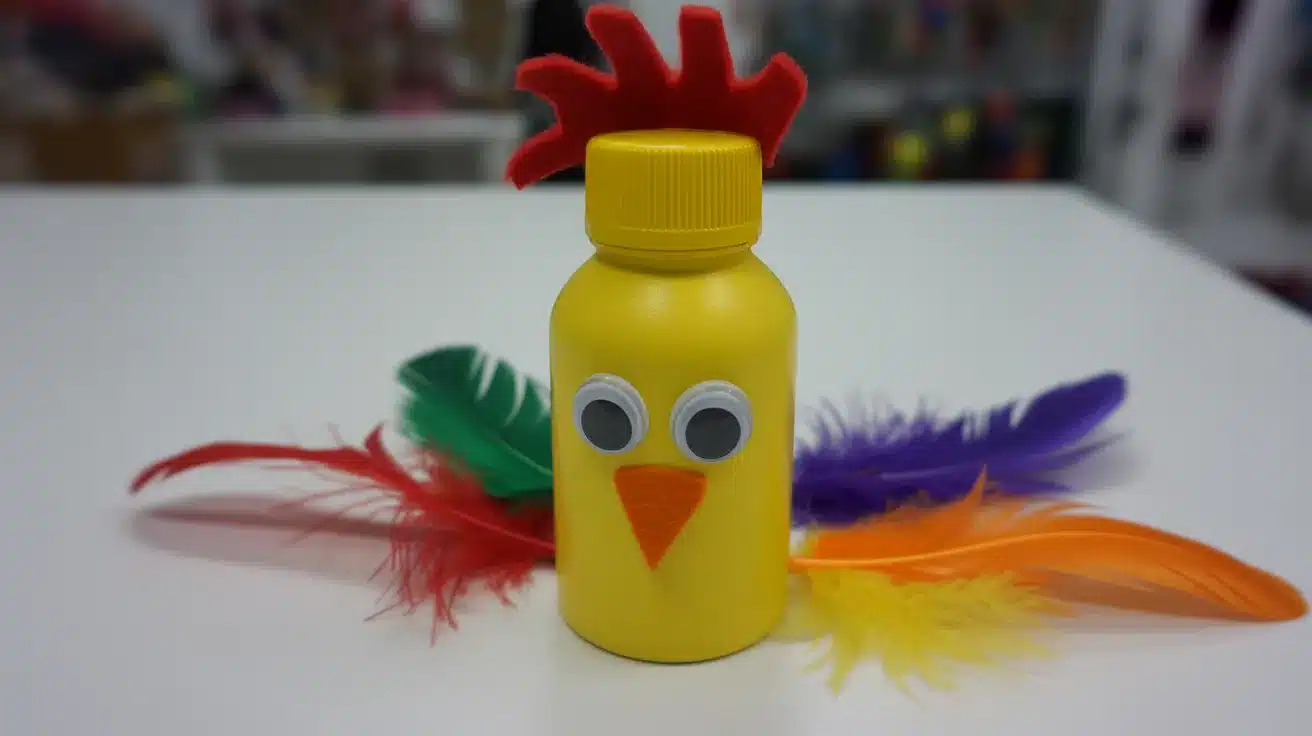
Give plastic bottles a second life by turning them into bright, cheerful chickens. It’s a great way to mix recycling with crafting.
Materials Required:
- Plastic bottle (small, like a water bottle)
- Yellow and orange paint
- Red felt or foam (for comb and wattle)
- Googly eyes
- Glue
- Craft feathers
Steps:
Step 1: Clean and dry the plastic bottle completely.
Step 2: Paint the entire bottle yellow, then let it dry thoroughly.
Step 3: Cut a comb from red felt and glue it to the top of the bottle cap.
Step 4: Cut a small wattle and glue it just below the front of the cap.
Step 5: Stick on googly eyes and glue craft feathers around the base for the tail.
8. Farm Animal Masks
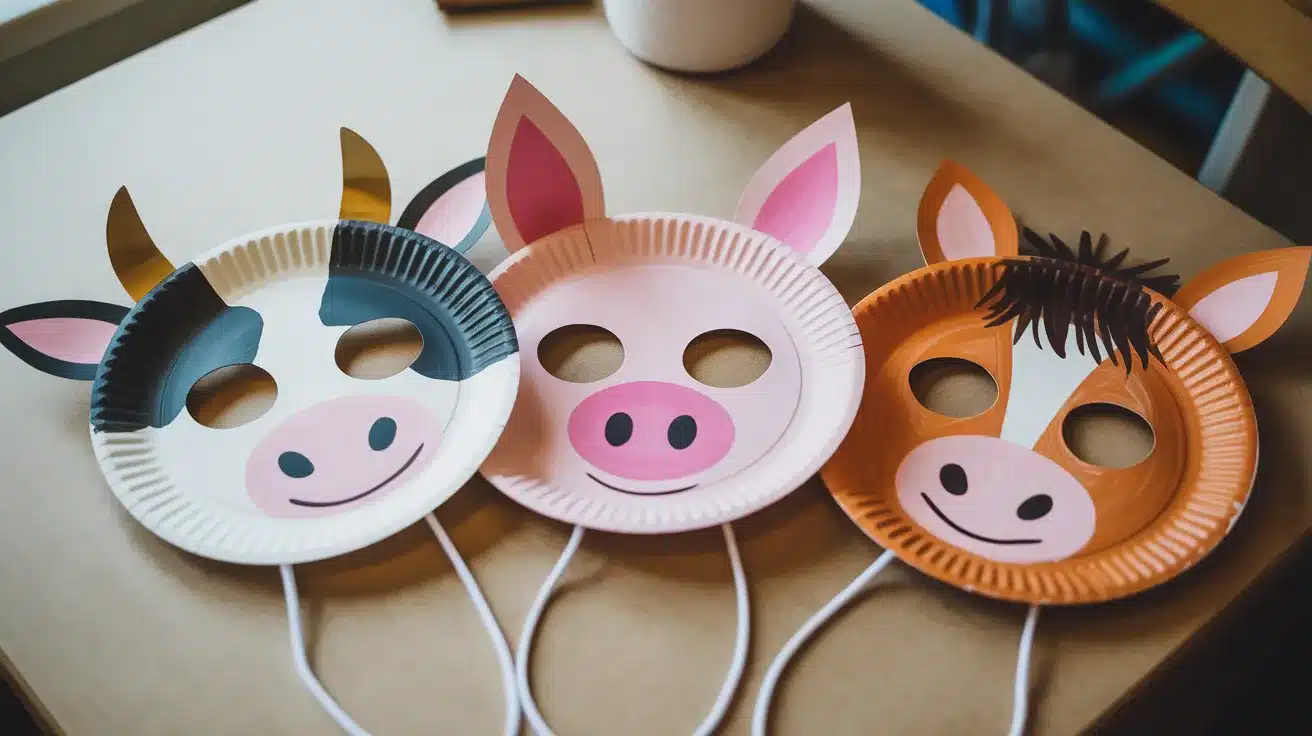
Wearable masks make farm crafts extra exciting. Kids can become their favorite animals and act out fun farmyard scenes.
Materials Required:
- Paper plates or cardstock
- Paint (various colors)
- Elastic string or popsicle stick
- Scissors
- Hole punch
- Markers
- Felt, foam, or feathers for decoration
Steps:
Step 1: Hold the plate up to the face, mark the location of the eyes, and carefully cut out the eye holes.
Step 2: Paint the plate in your chosen animal’s color and let it dry.
Step 3: Add ears, horns, or a snout using cut cardstock or foam and glue them on.
Step 4: Draw spots, nostrils, or whiskers with markers.
Step 5: Punch a hole on each side and thread elastic through, or tape a popsicle stick to the bottom as a handle.
9. Felt Farm Animal Puppets
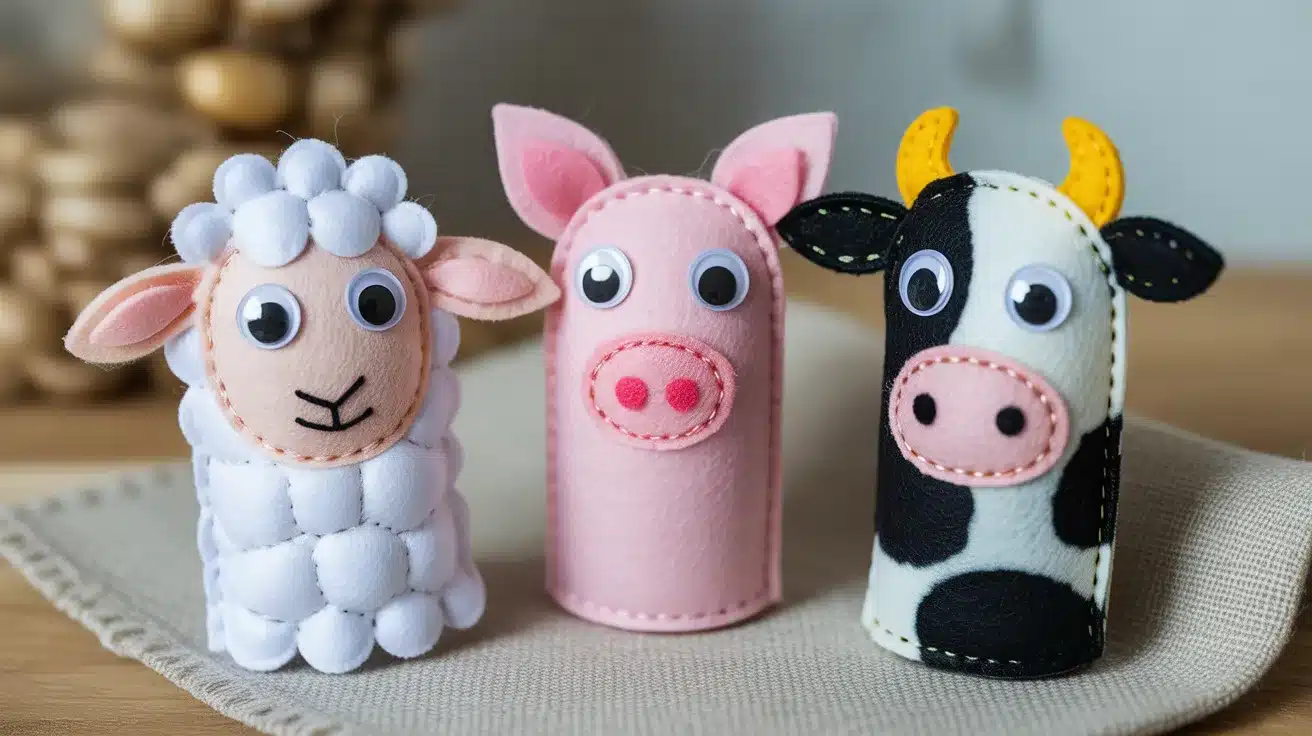
Felt is easy to work with and forgiving for beginners. These little puppets can be glued or stitched together for a soft, reusable result.
Materials Required:
- Felt sheets (various colors)
- Fabric glue or needle and thread
- Googly eyes
- Scissors
- Markers
Steps:
Step 1: Draw and cut out two identical animal-shaped felt pieces for the front and back of the puppet.
Step 2: Cut out ears, tails, snouts, or other features from different felt colors.
Step 3: Glue or stitch the features onto the front piece.
Step 4: Stick on googly eyes and add marker details like nostrils or a mouth.
Step 5: Glue or sew the front and back pieces together, leaving the bottom open as a finger slot.
10. Clay Farm Animal Sculptures
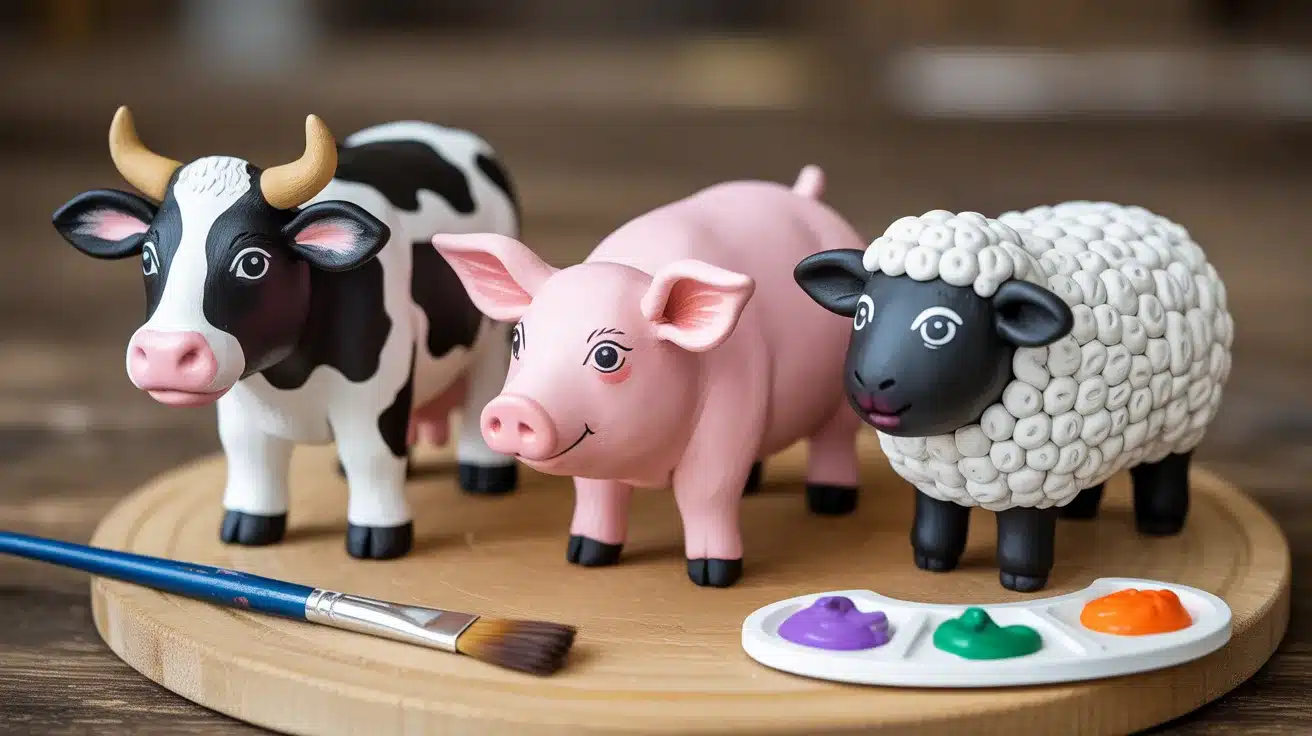
Air-dry clay is incredibly satisfying to work with. Shaping cows, pigs, and sheep out of it is a hands-on activity that kids and adults enjoy equally.
Materials Required:
- Air-dry clay
- Acrylic paint
- Paintbrush
- Toothpick or sculpting tool
- Varnish (optional)
Steps:
Step 1: Knead the clay until it’s soft and pliable.
Step 2: Shape the main body of your chosen animal using your hands or a sculpting tool.
Step 3: Attach smaller pieces for ears, tails, legs, and snouts, blending the edges as you go.
Step 4: Use a toothpick to add texture, such as wool lines on a sheep or wrinkles on a pig.
Step 5: Let the sculpture air-dry fully, then paint and seal with varnish if desired.
11. Farm Animal Wall Art
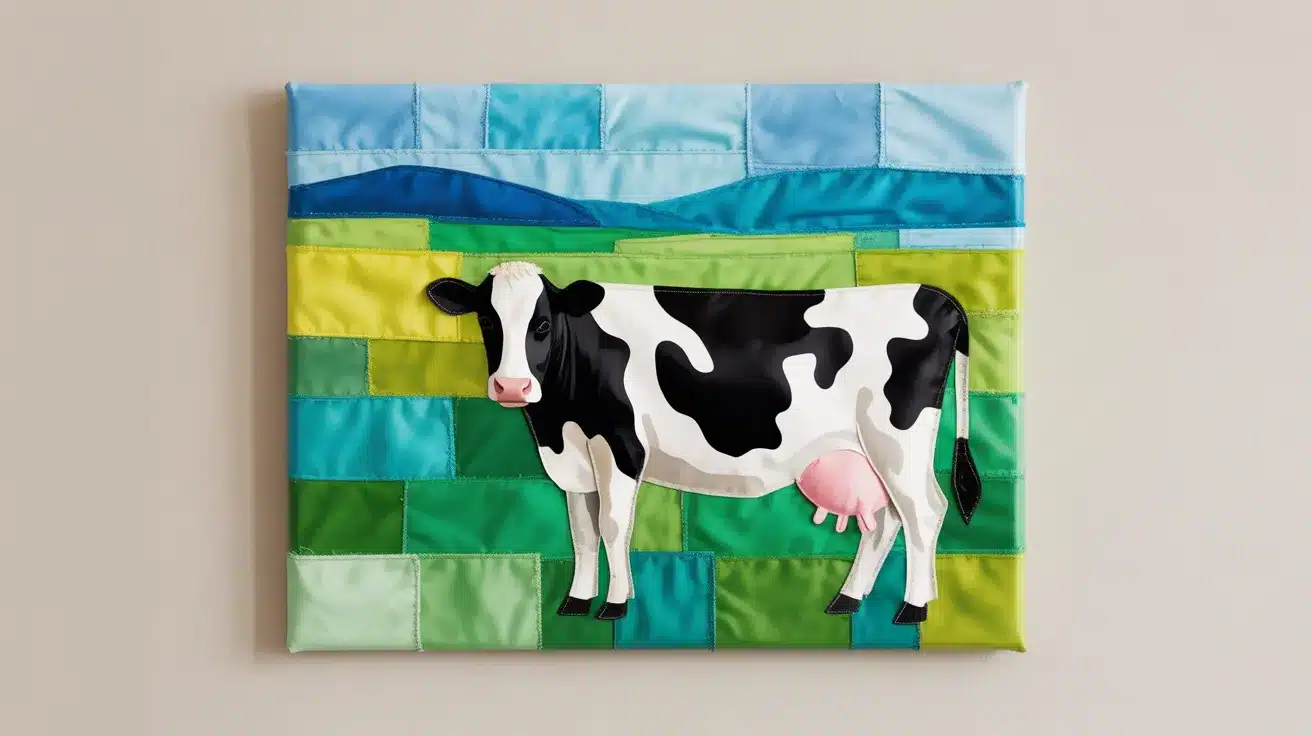
Farm-themed wall art adds a cozy, rustic touch to any room. Paint or collage your favorite animals onto canvas or cardboard for a piece worth displaying.
Materials Required:
- Canvas or thick cardboard
- Acrylic paint or watercolors
- Collage materials (fabric scraps, tissue paper)
- Glue
- Markers or paint pens
Steps:
Step 1: Sketch your chosen farm animal lightly onto the canvas or cardboard.
Step 2: Fill in the outline with paint or layer collage materials within the shape.
Step 3: Add a simple background, such as a field or sky, to give the scene context.
Step 4: Outline the animal with a marker or paint pen to make it stand out.
Step 5: Let everything dry, then hang or display your finished piece.
12. Straw Animal Craft
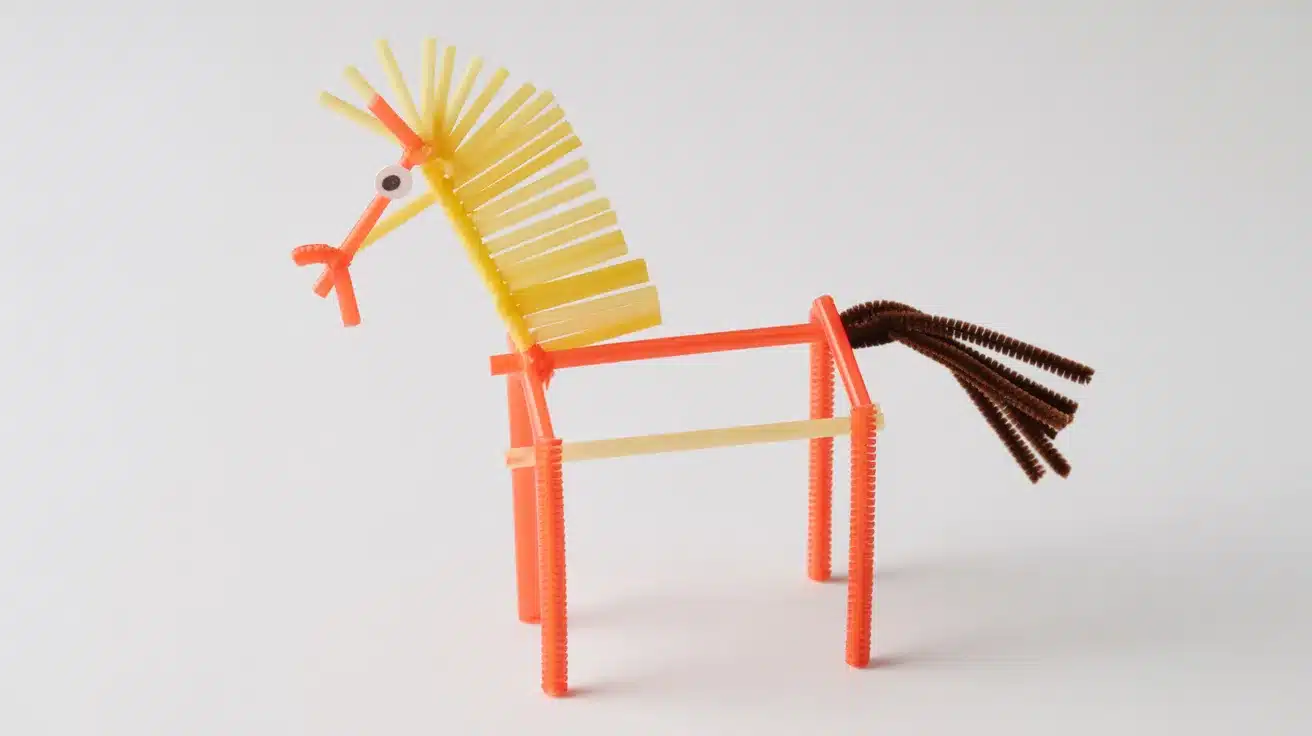
Straws and pipe cleaners are all you need to build simple farm animal shapes. It’s a lightweight craft that encourages creative thinking without much prep.
Materials Required:
- Plastic or paper straws
- Pipe cleaners
- Scissors
- Markers
- Glue or tape
Steps:
Step 1: Cut straws into varying lengths depending on the animal’s body parts, longer for legs and shorter for ears.
Step 2: Arrange them into the animal’s basic frame and secure joints with tape or pipe cleaner.
Step 3: Twist pipe cleaners around the frame to shape tails and ears.
Step 4: Draw a face on a small piece of paper, cut it out, and attach it to the head area.
13. Vegetable Garden Craft
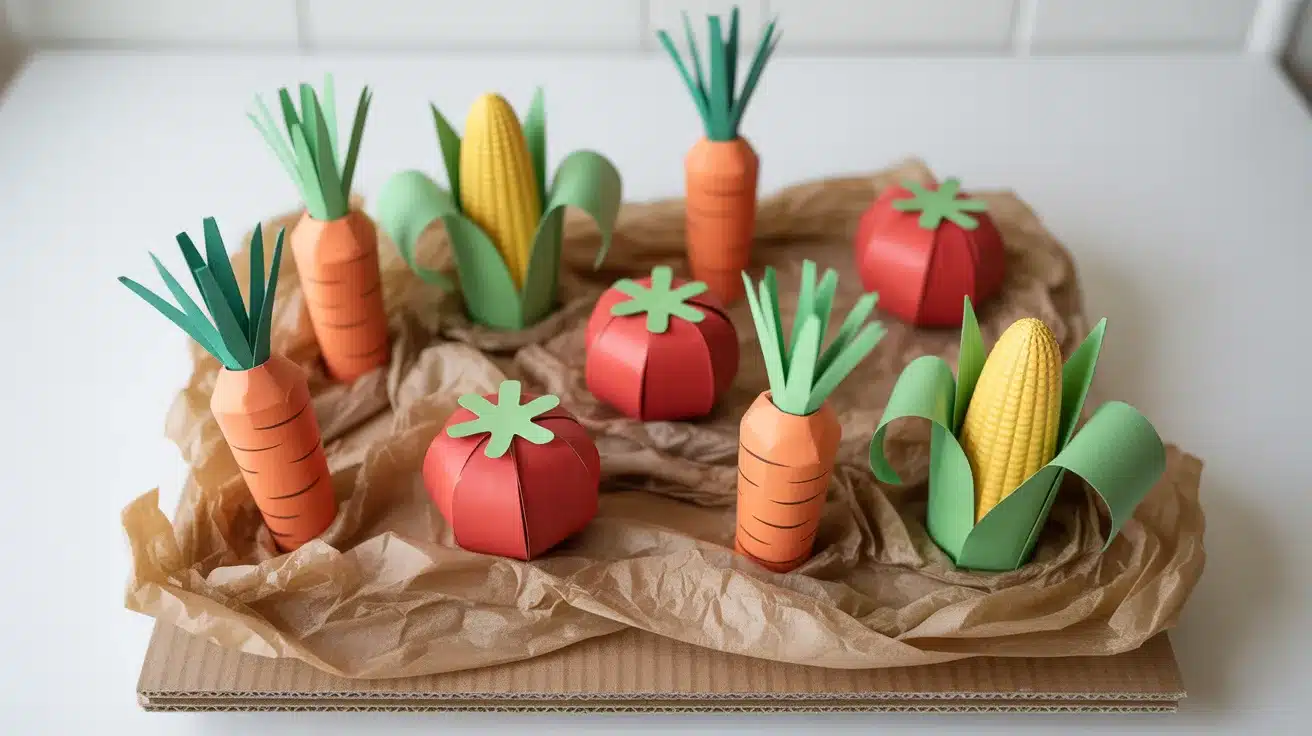
Create a colorful mini veggie patch using paper vegetables and textured soil. It’s a fun way to talk about where food actually comes from.
Materials Required:
- Green, red, orange, and yellow construction paper
- Brown tissue paper or crumpled brown paper (for soil)
- Cardboard base
- Glue
- Scissors
- Markers
Steps:
Step 1: Cover the cardboard base with crumpled brown paper to create a soil effect and glue it down.
Step 2: Cut out vegetable shapes like carrots, tomatoes, corn, and lettuce from colored construction paper.
Step 3: Add details to each vegetable with markers, such as lines on a carrot or seeds on a tomato.
Step 4: Glue the vegetables onto the soil base, partially tucking root vegetables in to look like they’re growing.
Step 5: Cut out small green stems and leaves and attach them to complete the garden scene.
14. Farmyard Collage Craft
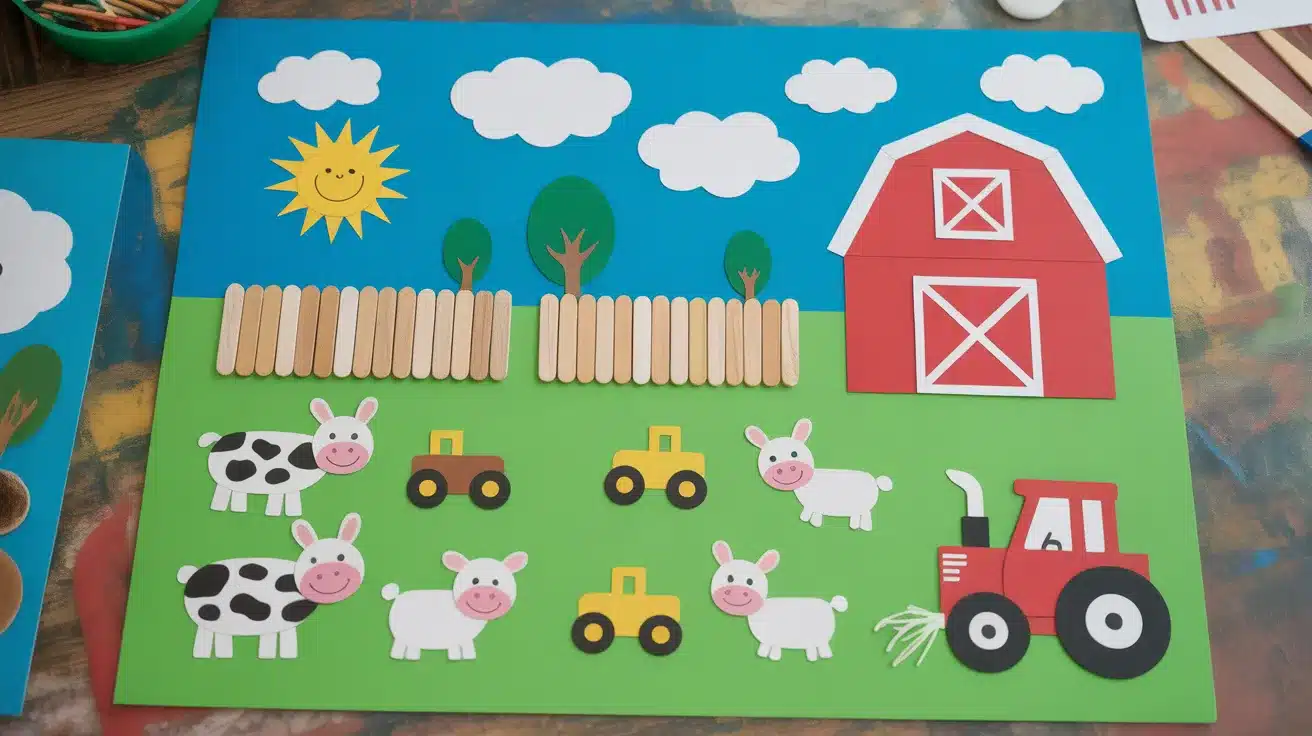
This is the big one, a full farm scene with barns, animals, tractors, and fields all made from mixed materials. It’s the ultimate farm craft project.
Materials Required:
- Large cardboard or poster board
- Construction paper (multiple colors)
- Fabric scraps, cotton balls, straw or raffia
- Paint
- Glue
- Scissors
- Markers
Steps:
Step 1: Paint the background with a blue sky on top and a green field on the bottom, then let it dry.
Step 2: Cut out a barn shape from red construction paper and glue it to one side of the scene.
Step 3: Assemble a tractor from brown and black paper and place it in the field area.
Step 4: Create farm animals using paper, cotton balls, or fabric scraps and glue them around the scene.
Step 5: Add finishing touches like popsicle-stick fences, a straw on the ground, and a sun in the sky.
15. Farm Animal Greeting Cards
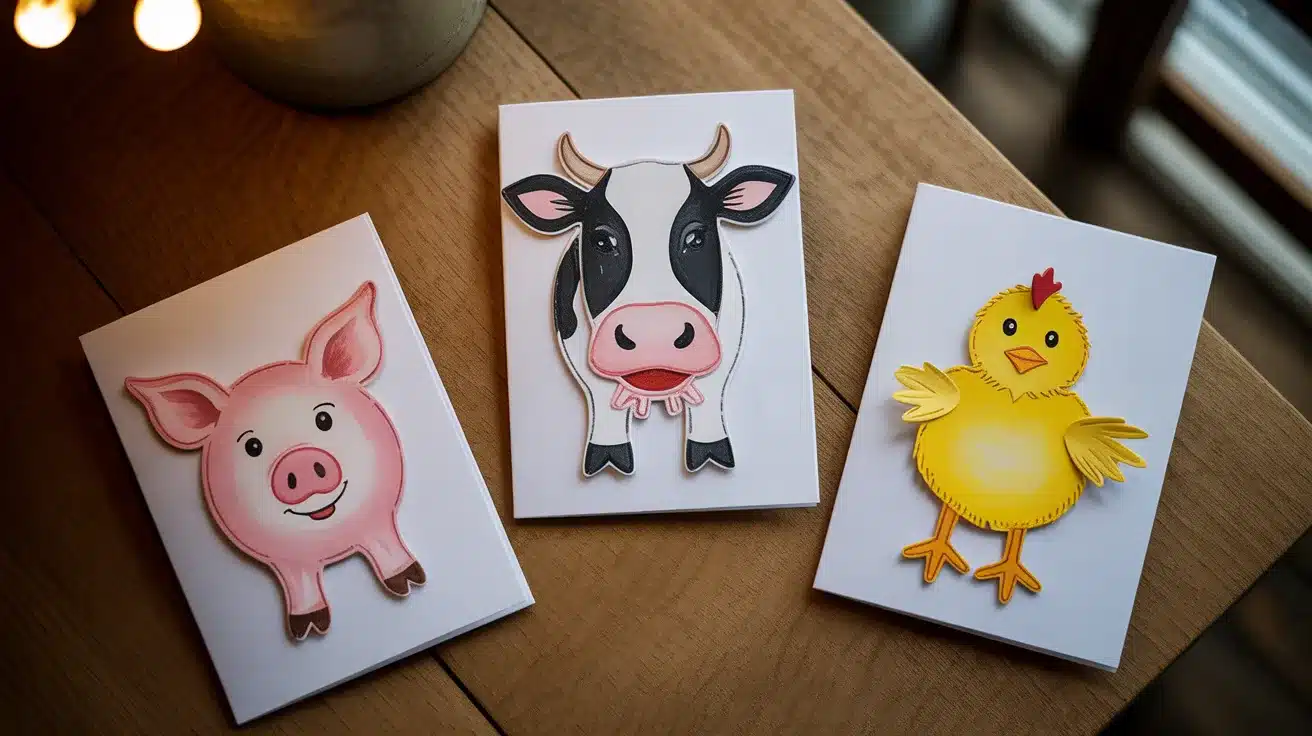
Handmade cards featuring farm animals are a sweet and personal touch for any occasion. They’re easier to put together than you’d think.
Materials Required:
- Cardstock (folded into a card shape)
- Paint or markers
- Construction paper scraps
- Glue
- Envelope
Steps:
Step 1: Fold a piece of cardstock in half to form the card base.
Step 2: Sketch or paint a farm animal on the front, a pig, cow, or chick, all work great.
Step 3: Add color and detail using markers or paint, keeping the design simple and cheerful.
Step 4: Cut small paper shapes for ears, beaks, or tails and glue them on for a 3D effect.
Step 5: Write your message inside and pair the card with a matching envelope.
Tips for Making Farm Crafts More Fun
A little extra thought can take any farm craft from fun to truly memorable. Try these ideas to keep the creative energy going.
- Use storytelling about farm life while crafting. Talk about what the animals eat, where they sleep, and what sounds they make. It keeps kids engaged and makes the activity feel much bigger than just gluing paper.
- Let kids choose their favorite farm animals. When they pick the animal, they’re already invested and the craft instantly feels more personal.
- Combine crafts with learning about agriculture. Sneak in a few facts about how farms work or where food comes from. It turns craft time into a learning moment without feeling like school.
- Display finished crafts as farm-themed decor. Hang the wall art, line up the puppets, or arrange the clay sculptures on a shelf. Seeing their work on display gives kids a real sense of pride.
Conclusion
Farm crafts are one of those activities that never really get old.
They’re easy to adapt, fun to personalize, and a great excuse to spend quality time away from screens.
Whether you tried just one craft from this list or worked your way through several, the important thing is that you made something with your hands and that always feels good.
If you’re looking for your next project, start with whichever craft caught your eye first and go from there. When you’re done, we’d love to see what you created!
Share your finished farm crafts in the comments below, tag us on social media, or pass this list along to a fellow craft lover.
Happy crafting, the farmyard is waiting!