
Each one of us wishes to go back in time and relive our childhood, but that’s obviously not possible. However, we have an idea that will make you nostalgic yet will make you relive your precious moments. As they say, age is just a number, so be it! Let’s get our hands into DIY and make a cardboard box car!
You can even make it for your child, who is surely going to be entertained for hours, not to forget, it is painful for us to throw this cardboard because they are extremely useful for crafting.
Hey! We know it seems complicated, but when we break it down into steps, it keeps getting easier. Without further ado, let’s tell you how you can make a cardboard box car.
(Keep reading to learn multiple ways of making your cardboard box car.)
Material Required
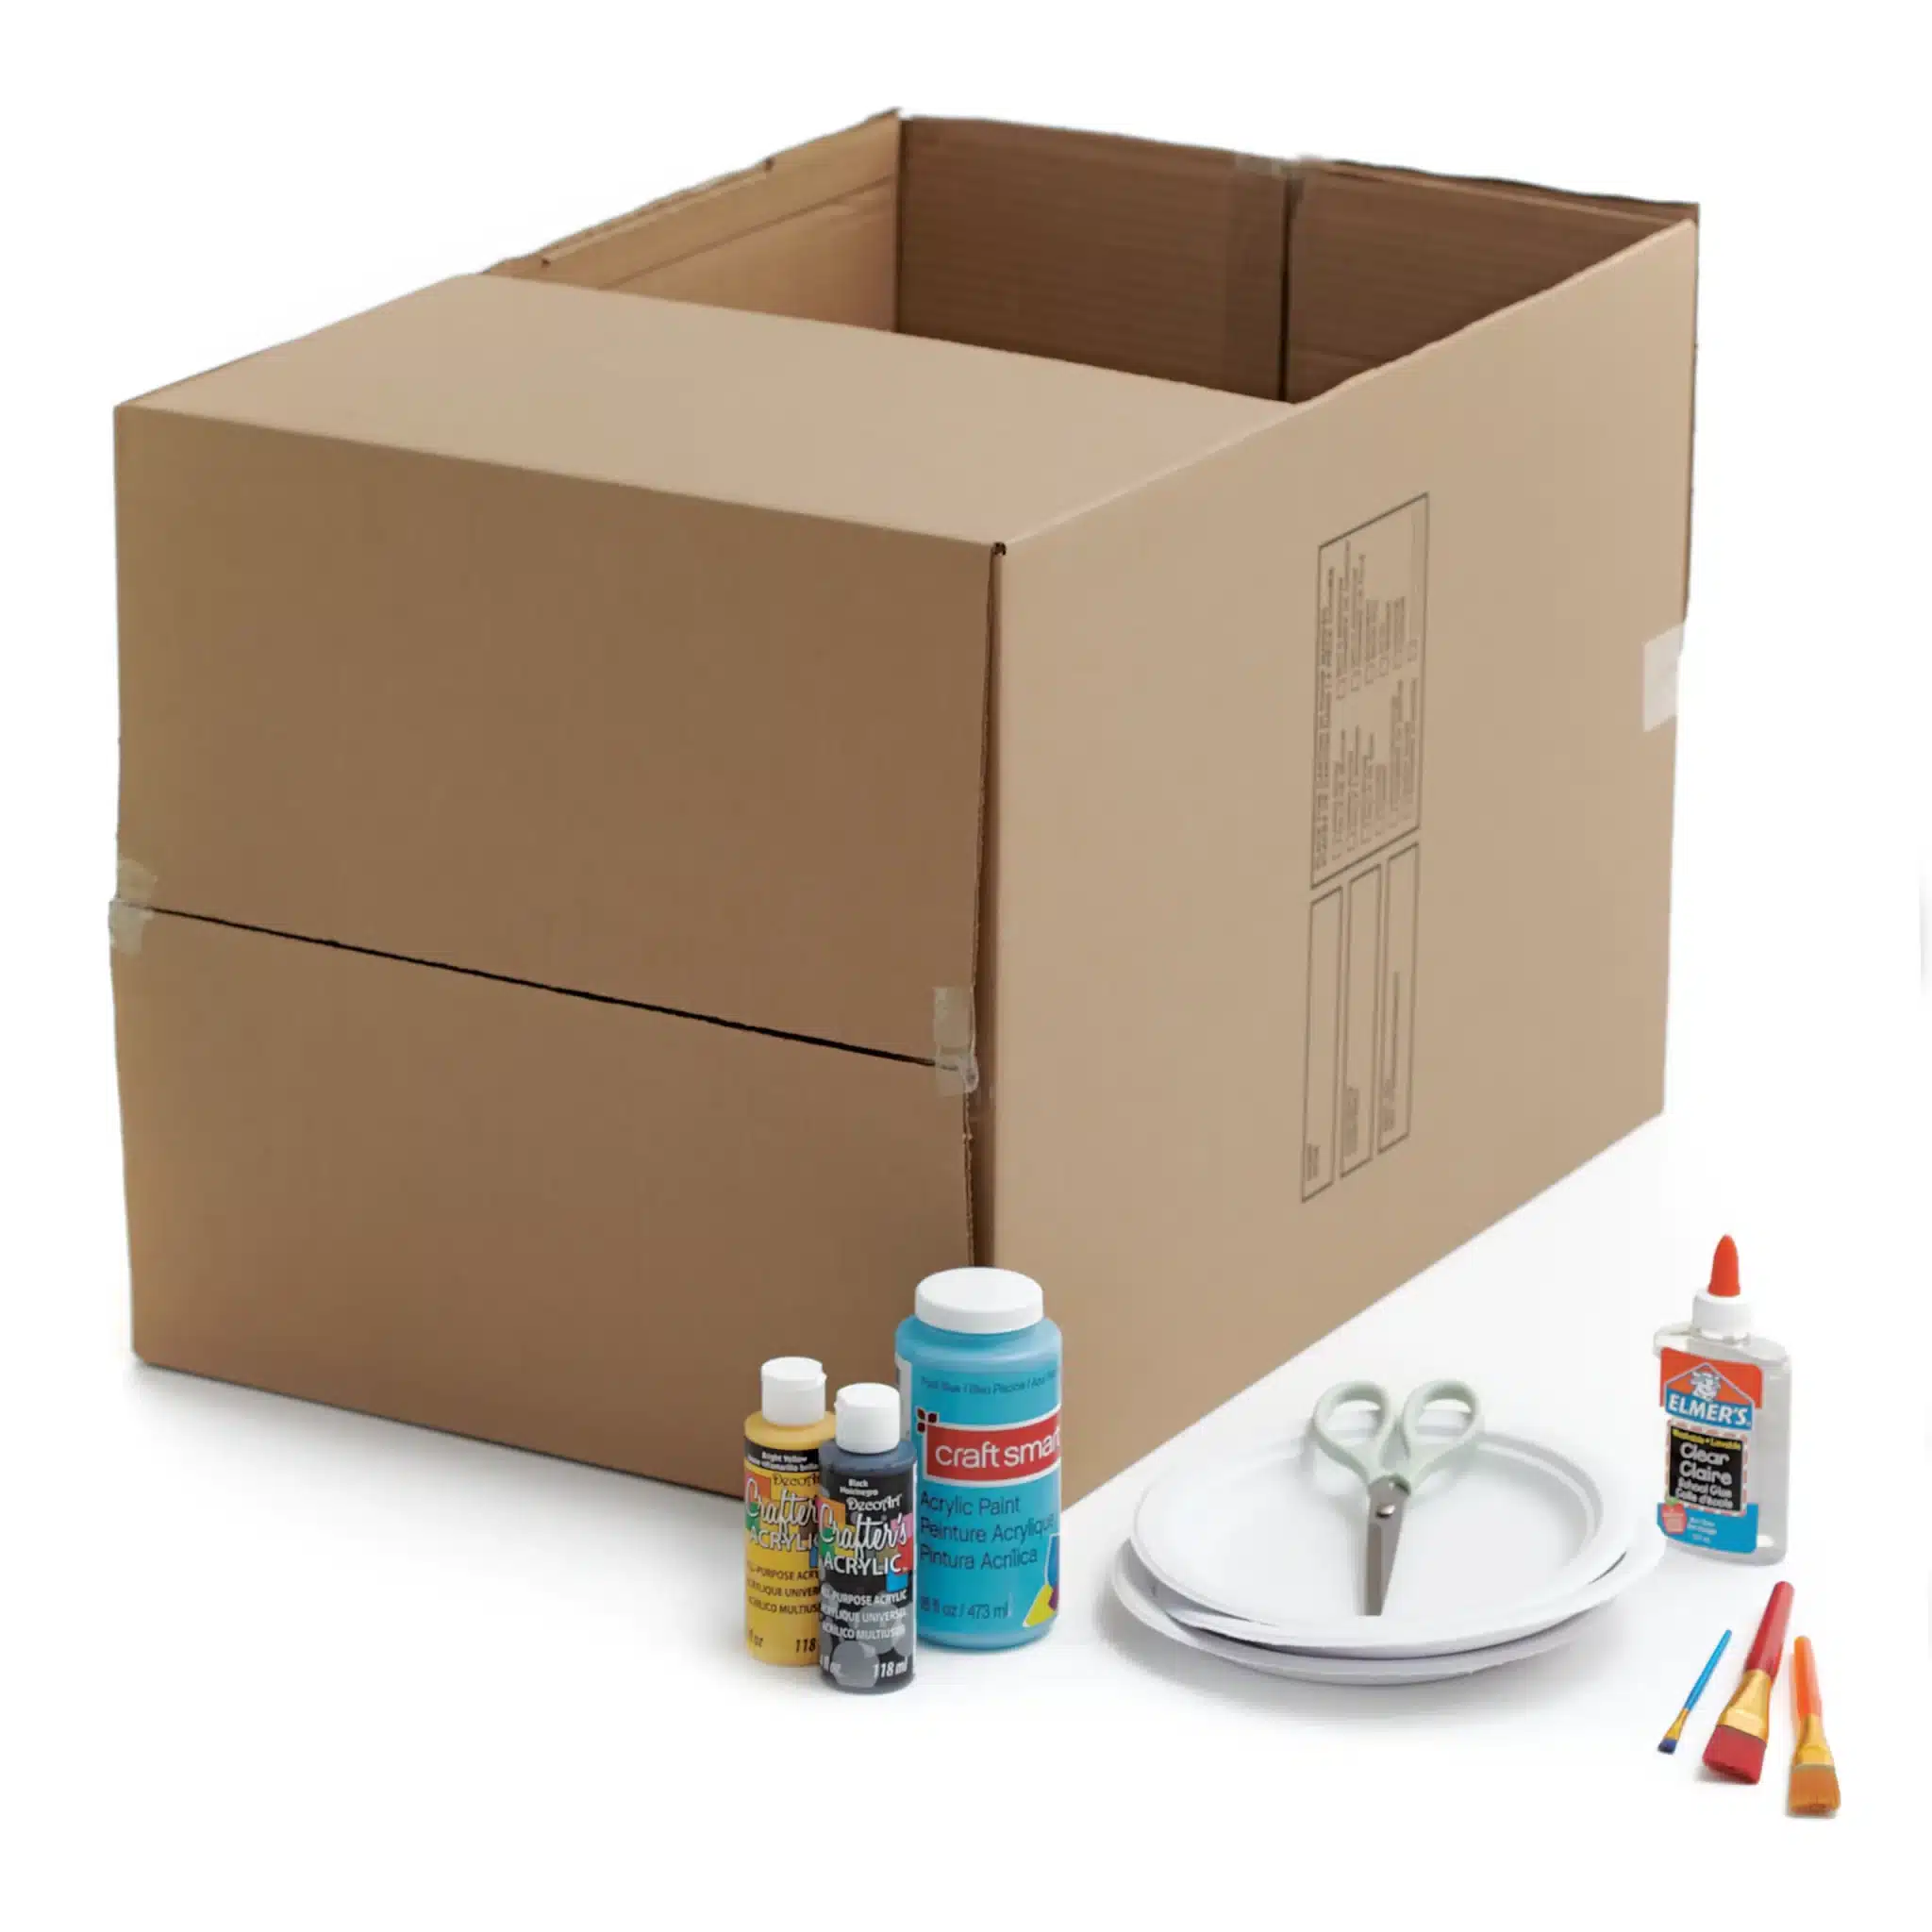
Before anything, make sure you have the following items ready:
- A big cardboard box
- A pair of scissors or a blade
- A glue (preferably hot glue) and a tape
- A ruler
- Pencils
- Markers
- Eraser
- A compass
- Colors and paints
Follow the Steps for The Perfect DIY
1. Assemble the Cardboard
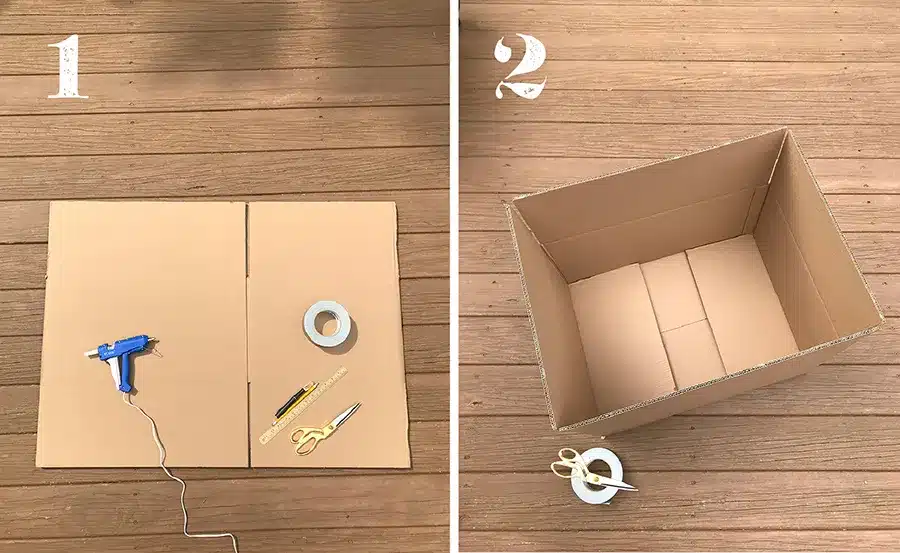
To make a cardboard box car, you need to assemble the box as per the creases and marks on it.
2. Secure It with Glue
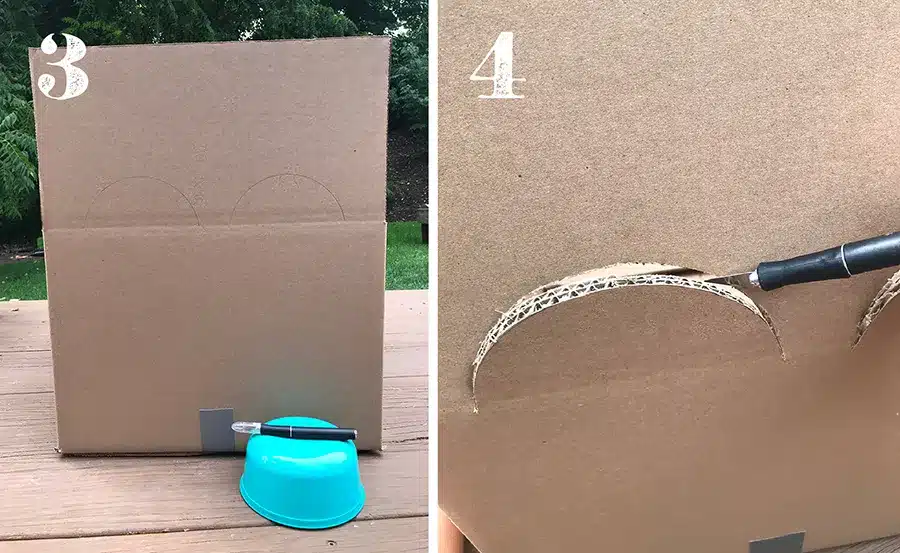
Use the glue to stick it and make sure to secure it perfectly because you need to do a lot of cutting, and you don’t want it to fall off.
3. Draw on the Flaps

Use your compass and draw a semicircle on the corners of the flaps on the side where it will fold to close the box. Make the semi-circle along the folds.
4. Cut Along the Semi Circles
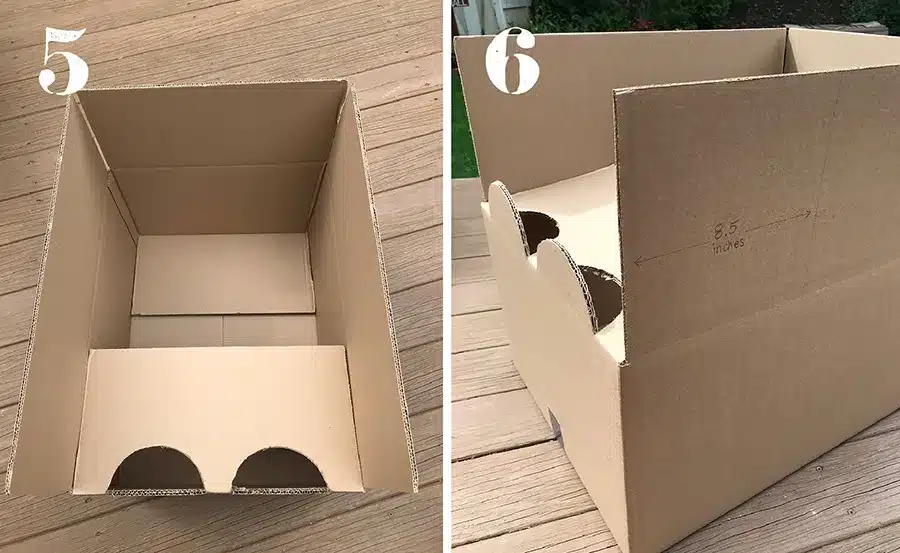
Make sure you cut exactly on the semi-circles; using a blade or cutter would be easier. In case it gets difficult to cut, you can heat one end of the blade over the flame and cut the semi-circles.
5. Your Headlights Are Ready!
Before you move ahead, turn the flaps down, making sure that the headlights are at 90 degrees. Refer to the picture for a better understanding.
6. Now, Onto the Other 2 Flaps
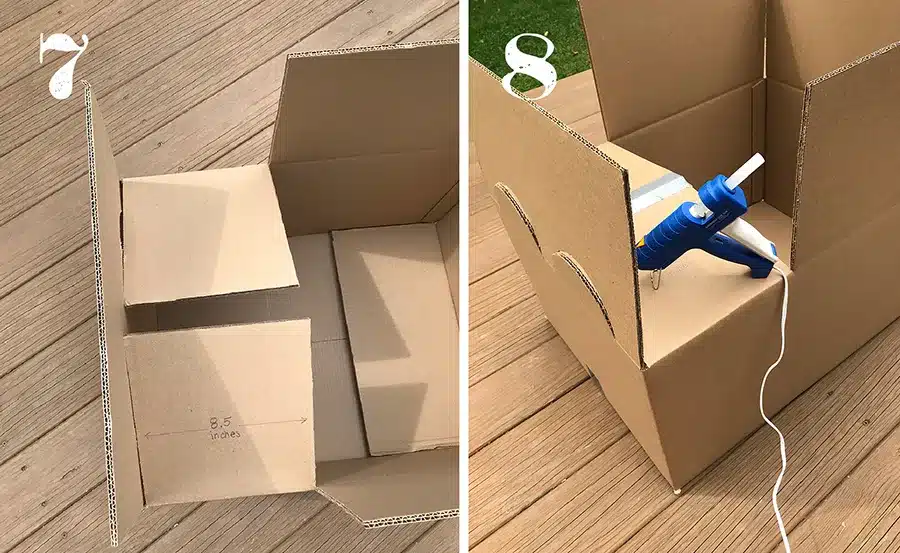
It’s time to measure about 8-9 inches (completely, depending on the size of the cardboard box you use) on the other flaps. Measure the same on the other flap as well. Also, cut the line you marked right now.
7. Stick with Glue
Take the parts you just cut off both flaps and stick them together using tape. Remember, the side should be the same as the headlights you made.
8. Secure the Headlights with The Flaps
Use hot glue and secure the headlights of the cardboard box car with the flaps that you stuck right now. Once your dashboard is prepared, hop to the next step.
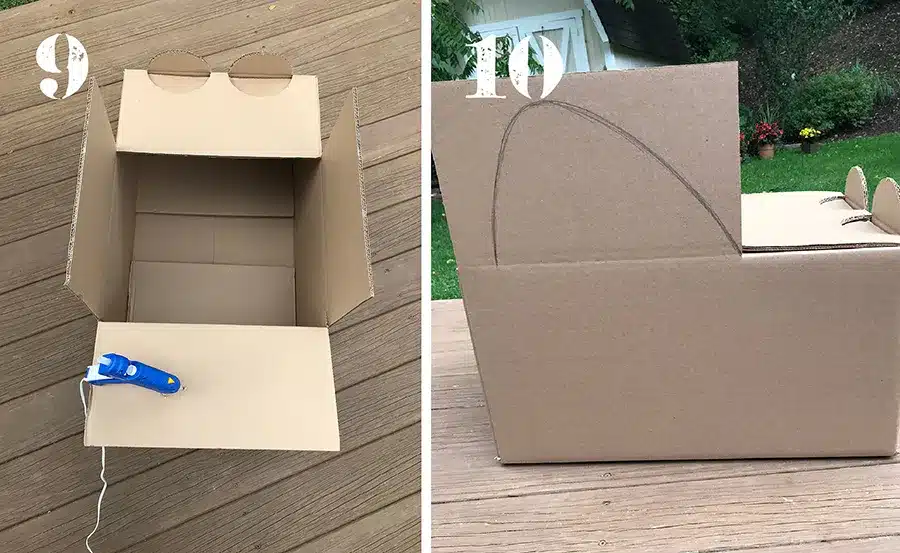
9. Keep a Check!
Refer to the picture above; so far, your cardboard box car should look like this. All good? Let’s move to the next step!
10. Other Side of The Panel!
The 8-9 inches flap that you’ve cut, barring that, you need to make a curve on the left-over side. We’re making the windows now, so make it huge and cover the full area of the leftover flap.
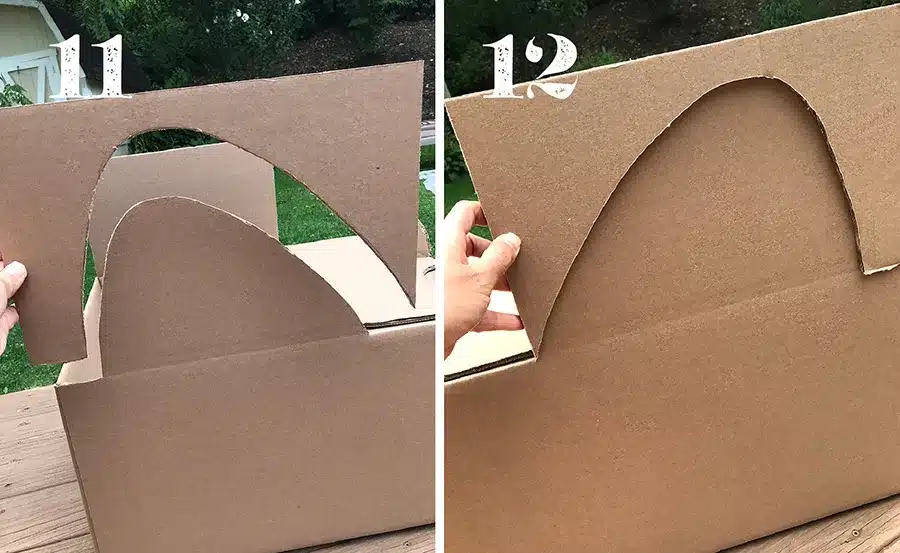
11. Get Done with The Windows

Every time we draw something, the next step is to cut it out. What are you waiting for? Just cut the window portion! Easy-breezy it is!
12. Make the Other Window
You need to ensure that windows on both sides are of the same size. It can be tricky to use a scale to measure the depth of the previous window.
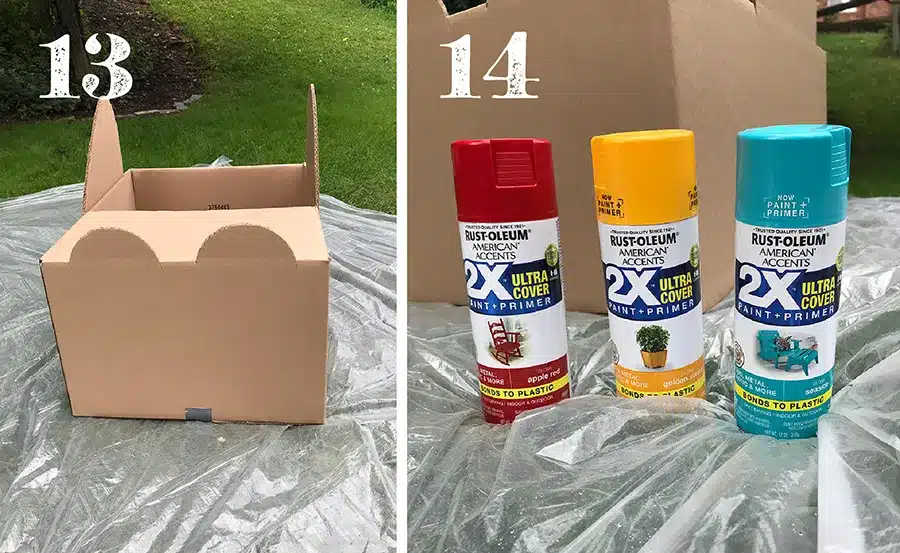
13. You’re Almost There

Again, give yourself a head up and check the picture above! Does it look the same? We hope it does! For the next step, gather your paint colors!
14. Paint It!

Either you are reminiscing about your good old days, or you are making a cardboard box car for your little one, make it colorful. Paint it with all your heart out! Best advice, make your child paint it!
15. Use Spray Paints
You can actually use spray paints for your cardboard box car for a finished look and also to keep it hassle-free! Spray paints are easily available at stationery stores and even online.
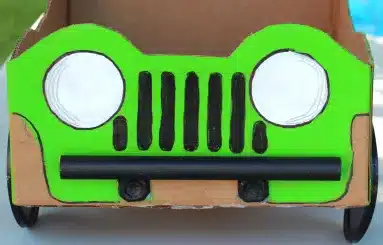
Time for Some Detailed Work!
It’s time to get into minute details to give finishing to our cardboard box car!
- Let’s begin with making the wheels. After all, what’s a car without wheels? Simply draw a wheel on the cardboard and paint it black! Now attach it with hot glue to the bottom. Pro Tip: Use black thermocol plates for wheels. Quick, handy, and easy!
- Where will you go without a steering wheel? Try the thermocol plate for this as well!
- Bumpers are absolutely optional. However, it does add to the aesthetics. Bumpers basically prevent the car from any collisions on the road and are placed on the front of the car. To make one, take cardboard paper or chart paper and cut it according to the length you require. Now roll the chart paper and secure it with some glue. Next, stick it to your cardboard box car; you are done!
- Add some pop of color with the headlight. Go for neon-shaded plastic glasses and simply stick them on the bonnet!
- The car is incomplete without the windshield; let’s keep it transparent using a transparent sheet. Past it, and you’re good to go!
Multiple Ways to Make a Cardboard Box Car!
There are simple ways to make a cardboard box car as well. Continue reading, and you’ll know. You would need everything we mentioned before. Therefore, keep them handy. Let’s begin:
- One of the easiest ways is to simply draw a complete car, including wheels, windows, and bumpers, on the cardboard box and cut it out. Now, paste it over a base of cardboard, and it’s time to paint!
2. In another process

- You have to tape the cardboard box, leaving one small flap outside because it’s going to be at the back of the car.
- Now, on the two long sides on top, divide it into three equal parts and cut them using a cutter or blade.
- You should be careful now because of the three parts you’ve cut, you must ensure that one part of it opens properly, whereas the middle one opens from just one side. Follow the picture for reference.
- Time to paint it and add additional parts if you wish!
3. In case you have not noticed, there are kits available in the market that help you make a cardboard box car. They have a guide book following which it gets all the easier.

4. If you want to avoid cutting, we assure you that this method has the least amount of cutting. After a point, you can genuinely keep your scissors and cutters aside. However, you require 3 cardboard boxes out of which two should be smaller than the third one.

- Bring these cardboard boxes together keeping the bigger one in the center.
- Now, you have to tape the smaller ones completely in the form of a box.
- The one in the middle should have one side open (refer to the image for clarity).
- For finishing touches, add the parts of the car and you’re done!
5. We have a feasible option for you
- Take a cardboard box and tape it entirely.
- Also, make semi-circles around both long sides of the box and cut it with the help of a box cutter.
- Now, cut the box into two-thirds.
- You can put up a transparent sheet for the windshield and use paper cups for headlights.
- Stick the wheels using glue, and voila, go for a drive!
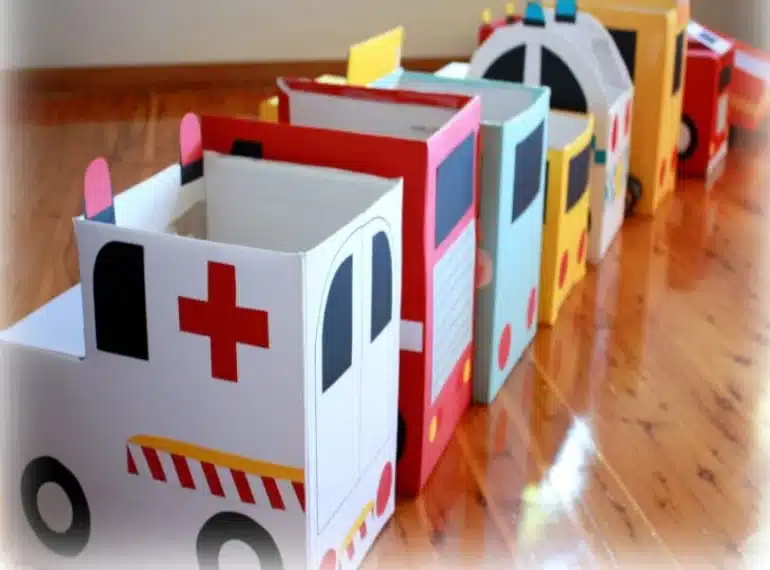
6. This one is super creative. Why just make a car when you can make ambulances, government vehicles, police cars, and so much more? All you have to do is, follow one of the above methods but paint it accordingly. You cannot paint black for an ambulance, obviously! Your cardboard box car is done!
7. The standing cardboard box car looks super cool. Follow whichever method suits you best, but do not forget to cut the bottom of the cardboard. It will give space to your little one’s leg. You do not need to put extra effort on the wheel, but if you need it for the sake of aesthetics, no one’s stopping you.

8. Another good idea could be to cut the pieces first, like cutting the windows, door, and windshield initially, and then get onto the pasting work. This will save time, and if at all you go wrong with the cutting, you have another chance to try. You’ll have the perfect cardboard box car in no time. Refer to the image if you are confusion. Remember, the sizes of windows, windshields, and even the car completely depend on you. We suggest you follow the process; for sizes, you can take it up yourself.

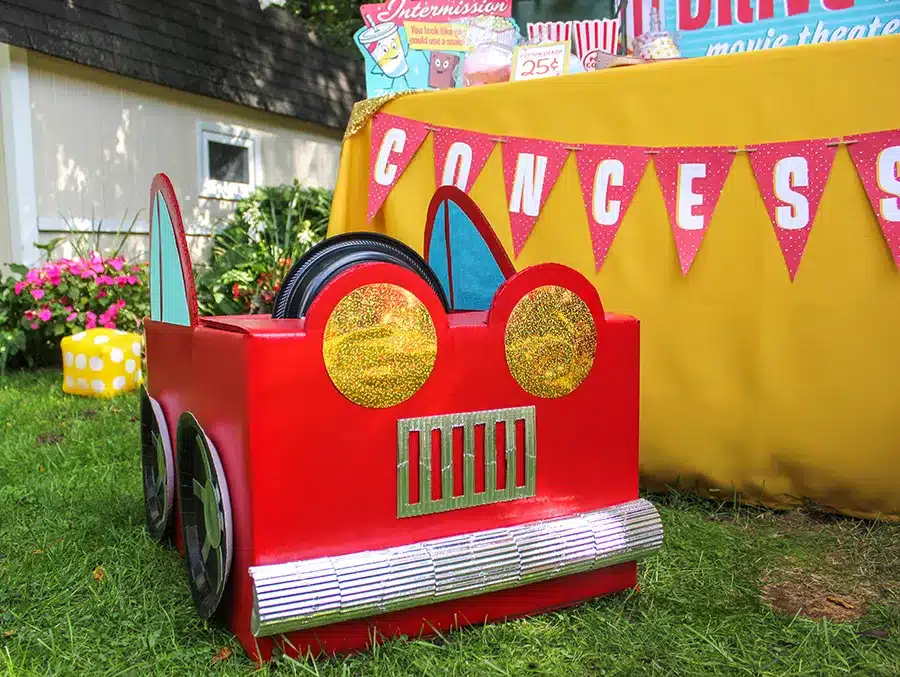
9. Make theme cars if you want to go extra. You can make Disney cars and give the front of the car the form of the face. No need for headlights here; just add two eyes and one mouth in the base of red color. Yipee! You can go for a drive!

10. This is, again, easy peasy. Assemble the cardboard box and tape it thoroughly. Now cut one half of the top and simply attach the steering wheel, wheels, headlights, and voila, your cardboard box car is ready.

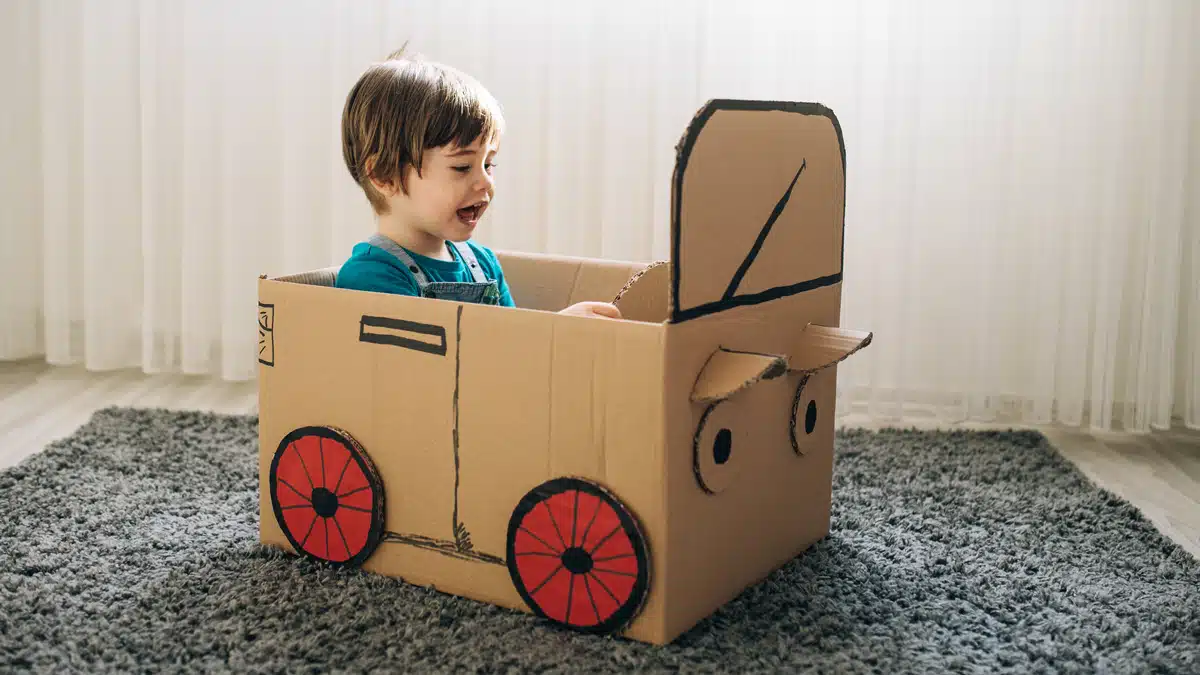
Fun Activity for Your Little One!
The cardboard box car making is such a fun activity to do along with your little one. Even though it can be time-consuming, the effort is worth it when you see your child enjoying it. Starting from assembling, cutting, pasting, and giving a finishing touch to the car will also bring out your child’s motor skills. Not less than a brain-developing activity, it will bring an essence of responsibility and patience to your child while polishing their skills in drawing, cutting, and painting.
It couldn’t be better when it gives a holistic approach to your child while making learning fun!
Make The Cardboard Box Car NOW!
Grab everything around you that can make your cardboard box car colorful and perfect! The entire process requires a lot of patience and glue; make sure you have both in good quantity.
Also, you can try the eco-friendly way. How? Opt for thermocol glasses for headlights, bamboo plates for the steering wheel, and jute ropes to attach and secure parts.
You will actually set the trend by doing this! Haven’t we given you enough ways to try your hands on the cardboard box car? What’s making you read this now? Start making one instead already!